Excellence in Instrument Manufacturing
for Over 65 Years

Your Partner in Surgery and Research | Excellence in Instrument Manufacturing for Over 65 Years

Instruments Care

Most Common Instrument Problems

Spotting (Light Colored Spots)

Cause: Water droplets condensing on the instrument and evaporating very slowly. Usually traced to high mineral content in the water supply.
Solution:

  • Follow the autoclave manufacturer’s instructions exactly.
  • Do not open the door until all the steam has been exhausted.
  • Check for leaky gaskets or valves which may cause condensation during the drying cycle.

Corrosion

Cause: Insufficiently rinsed linens or linens containing residue of caustic detergent chemicals.
Solution: Check with the laundry to be sure linens are rinsed thoroughly.

Cause: Baked-on blood in the box locks, serrations, and ratchets.
Solution: Open all box locks completely prior to cleaning.

Rust Colored Film

Cause: Water softeners can cause rust-colored, dust-like film under certain conditions. High iron content in water can also cause mineral deposits on instruments.
Solution: Consult with hospital engineering staff for an evaluation of your water treatment program.

Pitting

Cause: Exposure to saline solutions, blood, potassium chloride, and other compounds.
Solution: Rinse with distilled water as soon as possible after exposure.

Cause: Some detergents contain chloride or an acid base that, if not thoroughly rinsed from instruments, unites with steam in the autoclave to form hydrochloric acid.
Solution: Avoid detergents with chloride bases and select a detergent with a pH range no higher than 8.5.

Staining (Purplish-Black Stain)

Cause: Amine chemicals, which are used in steam lines to clean lime deposits, can be deposited on stainless steel by electrolytic action.
Solution: Use distilled or demineralized water instead of the local water source to cycle through the autoclave.

Eye & E.N.T Instruments

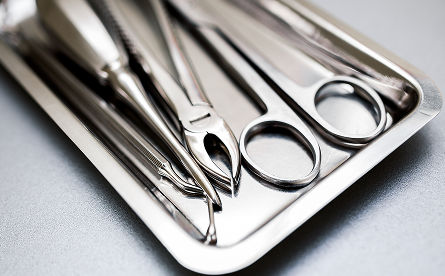
Microsurgical instruments are most vulnerable to damage through misuse, abuse, and rough handling. Their exacting performance is extremely crucial to microsurgery, so extra attention should be given to their care.

Best Practice for the Maintenance of Microsurgical Instruments

  • Carefully inspect all instruments when first purchased and after each use. Use a magnifying glass to detect flaws not visible to the naked eye, such as burs on tips, nicks on cutting edges, and proper jaw alignment.
  • During surgery, wipe off all blood and debris after each use. Use a non-fibrous sponge to prevent snagging and breaking delicate tips.
  • Clean all microsurgical instruments by hand and thoroughly dry before packing or storing. Avoid using a washer-sterilize ultrasonic cleaner.
  • Avoid metal-to-metal contact. Use special racks and cases to protect and separate tips.
  • Perform preventative maintenance on all micro instruments, including regular sharpening, realignment, and adjustment.


Use microsurgical instruments only for their intended purpose. Delicate construction can be easily damaged if used for other procedures.

Sterilization

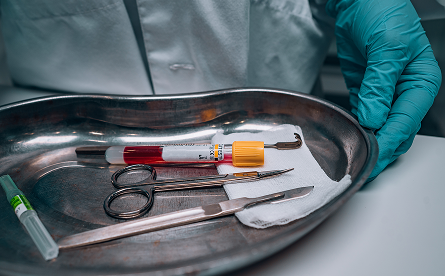
All surgical instruments must be sterilized prior to surgery to prevent infection. However, sterilization can leave contaminants behind if instruments are not properly cleaned.

Tips:

  • Sterilize instruments with the ratchets open for better steam penetration and to prevent box locks from cracking.
  • Use perforated pans or trays for improved steam penetration and more effective drying.
  • Place heavy instruments at the bottom and lighter, delicate instruments on top.
  • For paper or plastic pouches, do not stack them during sterilization. Use a spiral metal letter holder to permit proper steam flow.

Ultrasonic Cleaning

Tip: Heated tanks do not significantly improve cleaning. Ultrasonic cleaning is 16 times more efficient than hand cleaning.

Procedure:

  1. Clean instruments of all visible debris in an approved instrument cleaning solution before ultrasonic cleaning.
  2. Do not mix dissimilar metals (e.g., aluminum and stainless steel) in the same cycle.
  3. Ensure instruments have plenty of room; do not overload the cleaner.
  4. Open all instruments so ratchets and box locks are fully exposed.
  5. Remove instruments immediately after the cycle and rinse. Dry thoroughly to remove all moisture.
  6. Use a neutral pH ultrasonic solution. Do not use water alone.
  7. Change the solution at least daily or sooner if dirty or murky.

Steam Autoclave

Tips:

  • Lubricate all moving parts before autoclaving using surgical lubricants, not industrial oils.
  • Use only distilled water in the sterilizer reservoir to prevent staining.
  • Clean steam line filters and the chamber regularly following the manufacturer’s instructions.

Chamber Cleaning Steps:

  1. Turn off the unit and allow the chamber to cool. Remove trays and racks.
  2. Remove standing water with towels.
  3. Spray chamber walls with an approved cleaning solution and let it stand for 5 minutes.
  4. Brush the chamber walls aggressively with a stiff nylon-bristle brush.
  5. Wipe clean with towels and clean the gasket on the inside of the door.

Lubrication

Tip: Use a lubricant spray instead of a bath to prevent bacterial contamination. Lubricate all moving parts (joints, box locks, ratchets, screws) after every cleaning. Use only steam-penetrable surgical lubricants.

Wrapping Materials, Surgical Towels, and Drapes

  • Use minimal laundry detergent for reusable towels and drapes.
  • Extra rinse cycles help remove soap particles.
  • Place a towel inside packs to absorb moisture if packs come out wet.

Rust vs. Stain

  • Test: Use a pencil eraser to check discoloration. If removed easily, it’s a stain. If a pit remains, it’s rust.

Troubleshooting Stain Guide:

Stain ColorCause
Brown / OrangeHigh-pH detergents, Chlorhexidine, improper soaking, or tap water
Dark BrownLow-pH solutions, malfunctioning sterilizer, baked-on blood
Bluish BlackReverse plating, exposure to saline, blood, potassium chloride
MulticolorExcessive heat from localized hot spot in sterilizer
Light & Dark Colored SpotsWater droplets drying slowly, leaving minerals behind
Bluish GrayLiquid sterilization solutions used beyond recommendations
Black StainsContact with ammonia or ammonia-containing solutions
GrayExcessive use of liquid rust remover
RustBaked-on blood or soaking in tap water

Scissors Testing

  • Use Theraband rubber material to test scissors’ sharpness.
  • Medium-grade red: 4.5–12 inches
  • Yellow: 3–4 inches
  • Make several complete cuts through the material, reaching the distal tip.

Cold Sterilization

  • Not recommended for high-quality surgical instruments.
  • Do not immerse for longer than 20 minutes.
  • Avoid Benzyl Ammonium Chloride (BAC) for tungsten carbide instruments.

Warnings & Precautions

  • Observe universal precautions for all personnel handling contaminated medical devices.
  • Wear PPE: gown, mask, goggles/face shield, gloves, shoe covers.
  • Do not use metal brushes or scouring pads. Use soft-bristled nylon brushes and pipe cleaners.
  • Use low-foaming surfactant cleaning agents, fully rinse after cleaning.
  • Avoid placing heavy instruments on delicate devices.
  • Prevent blood, fluids, bone, tissue debris, saline, or disinfectants from drying before reprocessing.
  • Avoid solutions containing aldehyde, mercury, active chlorine, chloride, bromine, bromide, iodine, or iodide. Do not soak in Ringers Solution.
  • Avoid mineral oil or silicone lubricants.
  • Only include devices manufactured or distributed by Weldon in Weldon trays and cases.
  • Avoid descaling agents containing morpholine in steam sterilizers.

Instrument Care & Maintenance Guide

Proper care and maintenance of surgical instruments is essential to ensure long-term performance, prevent damage, and maintain patient safety. The following guide outlines common issues, preventive measures, and best practices for handling, cleaning, and sterilizing surgical instruments.

Instrument Care & Maintenance Guide

Spotting (Light-Colored Spots)

Cause: Slow evaporation of water droplets, often due to high mineral content in the water supply.
Solution: Follow autoclave manufacturer guidelines. Ensure steam is fully exhausted before opening the door. Check for leaking gaskets or valves that may cause excess condensation during the drying cycle.

Corrosion

Cause: Residual caustic detergents left on linens or inadequate rinsing.
Solution: Ensure linens are thoroughly rinsed.

Cause: Baked-on blood in box locks, serrations, and ratchets.
Solution: Always open box locks fully before cleaning.

Rust-Colored Film

Cause: Water softeners or high iron content in the water supply.
Solution: Request an evaluation of your water treatment system from facility engineering staff.

Pitting

Cause: Exposure to saline, potassium chloride, blood, or corrosive chemicals.
Solution: Rinse instruments with distilled water immediately after exposure.

Cause: Chloride-based or acidic detergents not thoroughly rinsed, combined with autoclave steam forming hydrochloric acid.
Solution: Use detergents with a pH no higher than 8.5 and avoid chloride-based substances.

Staining (Purplish-Black)

Cause: Amine chemicals from steam lines depositing onto stainless steel.
Solution: Use distilled or demineralized water in the autoclave.

Microsurgical Instruments (Eye & ENT)

Microsurgical instruments are extremely delicate and require careful handling. Their performance is crucial to precision surgeries, making proper maintenance essential.

How to Care for Microsurgical Instruments

Inspect instruments when purchased and after each use. Use a magnifying glass to check for nicks, burs, or misalignment.

Step 01.

During surgery, wipe instruments frequently using non-fibrous sponges to avoid damaging tips.

Step 02.

Clean microsurgical instruments by hand only. Avoid ultrasonic or washer-sterilizers. Ensure they are completely dry before storage.

Step 03.

Prevent metal-to-metal contact. Use protective racks, trays, or cases to separate delicate tips.

Step 04.

Schedule regular maintenance for sharpening, alignment, and adjustment.

Step 05.

Use microsurgical instruments only for their intended purpose.

Step 06.

Sterilization Guidelines

All surgical instruments must be properly cleaned and sterilized to prevent infection.

General Sterilization Tips

  • Sterilize instruments with ratchets open for proper steam penetration and to prevent cracking at box locks.
  • Use perforated trays for better airflow and drying.
  • Place heavy instruments at the bottom, delicate ones on top.


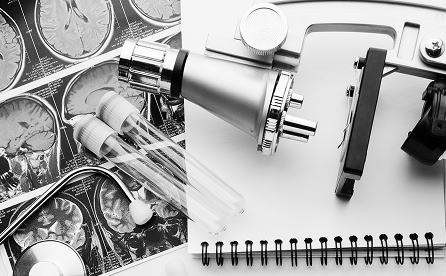
When sterilizing in pouches, avoid stacking. Use a stand (e.g., spiral metal letter holder) to keep pouches upright for correct steam flow.

Ultrasonic Cleaning

Ultrasonic cleaning is highly effective up to 16× more efficient than manual cleaning.

Ultrasonic Cleaning Best Practices

  • Pre-clean visible debris with approved solutions before placing instruments in the ultrasonic cleaner.
  • Do not mix dissimilar metals such as aluminum and stainless steel.
  • Avoid overloading; ensure all ratchets and box locks are open.
  • Run instruments for 10–15 minutes using a neutral pH solution.
  • Remove immediately after the cycle, rinse thoroughly, and dry completely.
  • Replace the solution at least daily or sooner if it appears dirty.

Steam Autoclave Instructions

Important Autoclave Tips

  • Only use distilled water in the sterilizer reservoir. Minerals in tap water cause staining.
  • Clean steam line filters regularly.
  • Clean the chamber weekly to prevent scale buildup.

Chamber Cleaning Steps

  1. Turn off unit and allow chamber to cool.
  2. Remove racks and trays.
  3. Remove standing water with towels.
  4. Spray interior with approved cleaner (e.g., Spectra-Clave™).
  5. Allow solution to sit for recommended time.
  6. Scrub with nylon-bristle brush and wipe clean.
  7. Wipe door gasket with a moist towel.


Lubrication

Proper lubrication prevents wear, dulling, and friction on moving parts.

Lubrication Guidelines

  • Use surgical lubricants only—they are steam-penetrable and safe for sterilization.
  • Apply lubrication after every cleaning.
  • Lubricate hinges, ratchets, box locks, joints, and screws.
  • Avoid lubricant baths; use sprays to prevent contamination.

Wrapping Materials, Towels & Drapes

  • Use minimal laundry detergent on reusable drapes; detergent residue becomes steam-borne and deposits on instruments.
  • Consider an extra rinse cycle to remove excess soap.

If packs come out wet, place a towel inside the pack for moisture absorption.

Rust vs. Stain
How to Tell the Difference

  • Use a pencil eraser to rub the discolored area.
  • If the mark removes and surface is smooth: It is a stain.

If a pit mark appears: It is corrosion or rust.

Steam Autoclave Instructions

Troubleshooting Stains Color Guide

Brown / Orange: High-pH detergents, chlorhexidine, soaking in tap water
Dark Brown: Low-pH solutions, malfunctioning sterilizer, baked-on blood
Bluish Black: Reverse plating, mixing metals in ultrasonic cleaner, exposure to salts
Multicolor: Excessive heat or hot spots in sterilizer
Light / Dark Spots: Minerals left after water droplets dry
Bluish Gray: Over-used cold sterilization solution
Black: Contact with ammonia
Gray: Overused rust remover
Rust: Baked-on blood or soaking in tap water

Scissor Testing

To ensure scissors are properly sharpened, use Theraband testing material:

  • Red Theraband: For scissors 4.5″–12″
  • Yellow Theraband: For scissors 3″–4″

Make several complete cuts through the material, especially at the distal tips.

Cold Sterilization (Not Recommended)

  • Avoid long-term soaking; do not exceed 20 minutes.
  • Do not immerse tungsten carbide instruments (gold handles) in BAC-containing solutions.

BAC can loosen tungsten carbide inserts.